Share it!
Focaccia is a traditional Italian bread. It is a pretty standard yeast bread dough with some added ingredients that make it unique. The loaves are round-ish and flat and very very tasty.
I could say that my great great grandmother who hailed from a small Tuscan village passed this acient focaccia recipe down through the generations but that would be a frickin' lie.
Truth is my dad, a great bread maker, learned this recipe when we had it out at an Italian bistro. It was such a treat when he made it. The house smelled wonderful of rosemary and sea salt and frying onions.
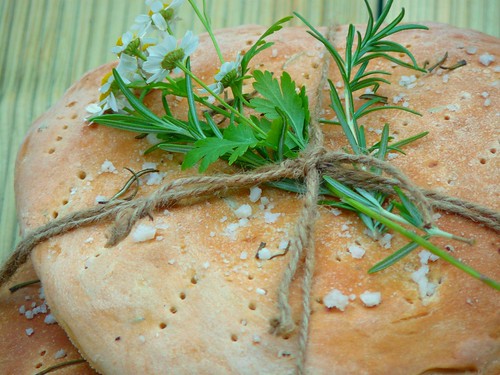
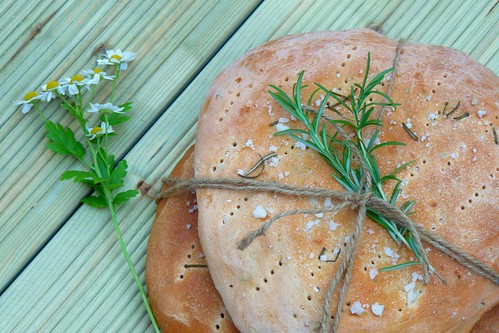
For wrapping all you need is some jute twine or raffia and a sprig of rosemary.
Bind the loaves together like you are wrapping a parcel and just pop the rosemary under the knot. You could also use a rose bud or any other bit of greenery you fancy.
So simple and yet straight from the heart.
The Ingredients
1 and 1/2 cups warm water
1 sachet dry fast acting yeast
1/2 tsp sugar
3 tbsp olive oil for the dough plus more for brushing and cooking the onion
1/2 tsp sea salt for dough plus more for sprinkling
1 tsp finely chopped fresh rosemary
1 sprig not chopped rosemary for sprinkling
3 cups flour for the initial dough plus 1-2 cups more for kneading
1 onion finely chopped
1-2 tbsp coarse cornmeal
The Tools
Just the standard bowls, knives, oven, frying pan.
Electric whisk would be handy for initial mixing.
Your hands are essential!
The Method
- Very slowly saute the onion in some olive oil until it is golden. Set aside to cool. This can be done in advance
- Put warm water and sugar in a large mixing bowl and give it a stir to combine
- Sprinkle water with yeast and set aside for 10 minutes. The mixture should get frothy
- Once frothy add the olive oil and salt
- Start to gradually add the flour mixing with your beaters. After about the second cup of flour goes in the mix will be too difficult for the beaters so pour in the rest of the flour and the onions and rosemary and mix with a spoon or spatula.The dough will still be very sticky
- Dust your work surface and hands with flour and turn the dough out on to the floured surface
- Start to knead and add flour as necessary working it in to make the dough leass sticky.Keep kneading and adding flour until the dough loses its stickiness. It will take about 10 minutes of kneading and will become quite elastic and springy
- Form into a ball and place in a greased bowl. Turn the dough to coat it all over with the oil. Cover and let it sit for 40 minutes
- Oil two baking sheets with olive oil and sprinkle with coarse cornmeal
- After 40 minutes punch down the dough and divide it in half
- Form each half into a flat round of about 10-12 inches and place each on your prepared baking sheets
- Cover and let rise again for another 40 minutes
- Heat your over to 375F
- JUST before baking prick the tops all over with a fork, brush with olive oil and sprinkle with sea salt and rosemary
- Bake the loaves separately for about 30 minutes each until the bottoms are crisp and the tops browned
- Cool on a rack
The Plan
The day before
If you want your bread fresh out of the oven for when your guests arrive, sauté your onions the day before and have them ready in the fridge.
3 hours before
In all it will be about one and a half to two hours to make the dough and have it ready to go in the oven. Bear in mind that 80% of that is waiting around for the bread to do what it has to do so you will have plenty of time to get anything else you are doing ready.
1/2 hour before
If you have the first loaf ready to go in the oven about half an hour before your guests arrive it will make the house smell warm and welcoming and be lovely and fresh for dinner.
You can of course make it all up ahead of time. The focaccia will keep well for a day or two. And if you have any left over you can make focaccia chips!
Recommendations
I have to confess that the loaves pictured here are my second attempt. The first try turned out well and looked pretty much the same but I didn’t have time for pictures. I also wanted to test out a few things before posting the recipe up.
If you plan to try making your own bread I would recommend investing in a good kitchen timer if you don’t have one on your stove or oven. One that dings or rings or buzzes or clucks, barks, moos. (Oh man if anyone knows where I can get a clucking or mooing timer let me know!) This is so you know that you have kneaded and let the dough rise the right amount of time.
I am not experienced enough to know by feel when the dough has been kneaded enough. The recipe recommends 10 minutes. Set the timer so you know that you have given it at least that amount of time and you will know for sure that you have kneaded enough.
Same goes for resting and rising.
Making good bread is an exercise in patience. It cannot be rushed.
The recipe here calls for sauted onions. And it really does take about half an hour on a slow heat to get them lovely and gooey and golden. But you can leave them out and incorporate other things.
The loaves above have minced garlic instead of onions and the next batch I make will have olives and sundried tomatoes!
Artisan bread also makes a beautiful gift for a new neighbour or house warming or hostess or just because!


